
Product shots become fixed the exact moment a camera captures their final frame. Family photographs, concept art, and archived stills face the same limitation after capture. These images compete for attention across feeds built around constant visual movement today.
Using AI image-to-video converter technology adds motion photographs never contained before. Filmora offers several models, but prompts determine whether results appear cinematic or distorted. This guide explains the workflow and shows how to create usable moving clips.
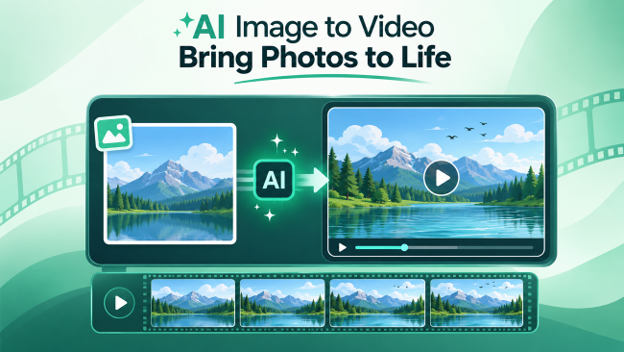
Part 1. What Motion Adds to a Still Image
Animating a photo differs from applying a basic slideshow pan or zoom effect. Those effects move across the frame while the original image remains completely static. Generative models create new frames where subjects move, parallax appears, and lighting shifts. This difference turns strong photographs into source material for clips and future posts.
An AI image-to-video converter helps stretch each shoot further across different content needs. The table below shows 4 situations where this approach earns its place most:
| Where It Gets Used | What the Motion Is Doing There |
| Social Posts and Short-Form | Stops a still frame being scrolled past, since a feed rewards anything that moves in the first second. |
| Product and Listing Pages | Shows a garment falling or a device turning, which a flat catalog photo cannot demonstrate. |
| Family Photographs and Archives | Suggests the few seconds around a moment that only ever existed as a single frame. |
| Storytelling and Illustrated Scenes | Turns artwork into a shot, so a book page or a concept board becomes something that plays. |
Part 2. How Filmora Generates a Clip From a Single Photo
Generative video is more a numbers game than settings because outputs always vary. The same photo and prompt will not return the same clip twice. A photo-to-video AI attempt stays in Filmora, making rejected results cheap regenerations.
Its mode dropdown includes Google’s Veo 3.1, Sora 2, Seedance 2.0 and lighter standard modes. Go through the steps below, from image upload to placing clips on timelines:
Step 1. Access Image to Video Tool
Once you open Filmora, press the “Toolbox” option in the left side panel and choose the “Image to Video” tool.
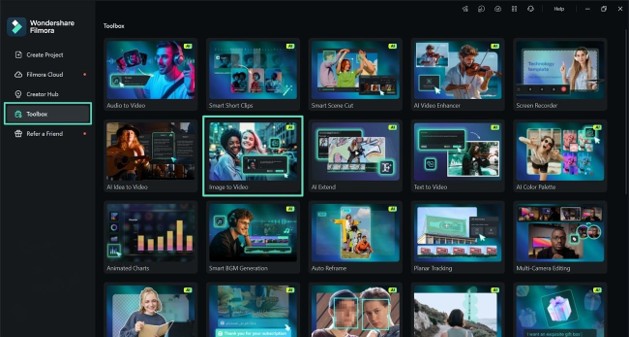
Step 2. Import the Image and Choose the Generation Model
Afterward, a new project will be created for image-to-video generation. Import your image and enter the text prompt to describe the image animation. Choose the video model, resolution, and duration. Next, press the “Generate” button.
Step 3. Preview and Export The Generated Video
Once the video is generated, it lands in “My Files.” Drag and drop the clip onto the timeline to trim if needed. After the clip is finalized, press the “Export” option in the top right corner to save it.
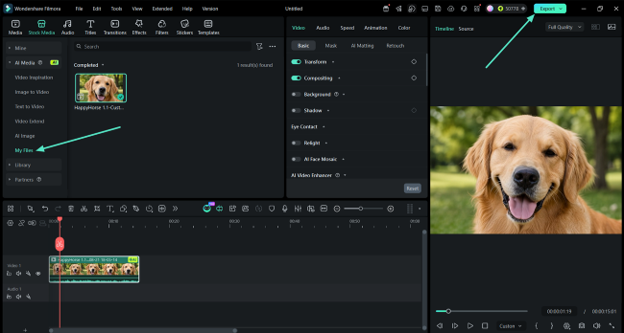
Note: The same photo and prompt will not produce the same clip on a second run. Save a result you like before generating another, because the earlier one does not come back.
Part 3. Getting a Believable Result Instead of a Warped One
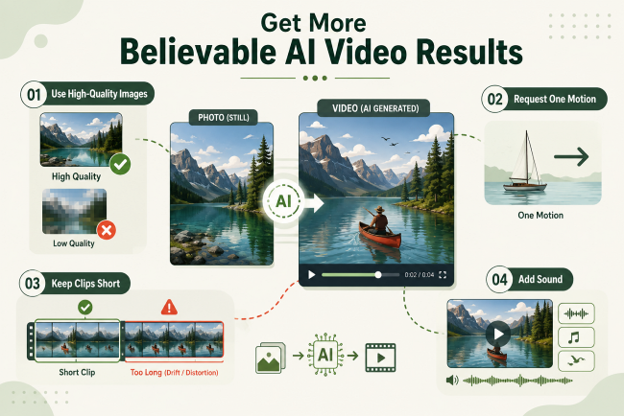
Attempts to animate static photo collections can produce distorted hands, faces, and text. Most visual errors begin with choices made before pressing the Generate button. The tips shared below help reduce these problems and produce believable video.
Give the Model Enough Image Detail
Generative models read source images first, so small compressed files provide less detail. Missing details get invented, often causing extra fingers, smeared backgrounds, and visual errors. Use full-size camera files and never copy compressed through messaging apps before generation begins.
Request One Motion at a Time
Combining 3 prompt ideas often causes warped results because instructions compete during generation. Camera movement, subject action, and lighting changes together can confuse the model badly. Request one motion, generate the clip, then choose what your next attempt changes.
Keep Clips Short and Cut Early
Generated motion holds together at first but often starts drifting as clips continue. The final second can look worse, so cut before visible drift begins appearing. A realistic two-second insert works better than a distorted six-second generated video clip.
Add Sound to Make Clips Believable
Silent generated clips feel synthetic because real streets and kitchens contain natural sounds. Filmora AI Music Generator and AI Sound Effect Generator can create supporting audio. Even low room tone improves believability more than another prompt generation attempt does.
Part 4. Filmora Tools That Pair With Image Generation
An AI video generator from image creates raw clips that still need editing before use. Now, let’s explore 4 tools in this video editor for finished sequences.
- AI Image Generator: Create a still from text when no suitable photograph exists. Then animate it inside one program using the same descriptive language throughout.
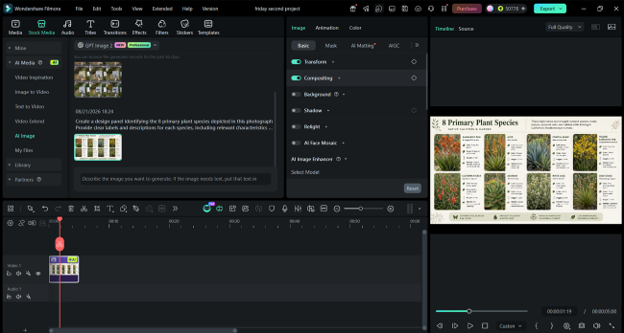
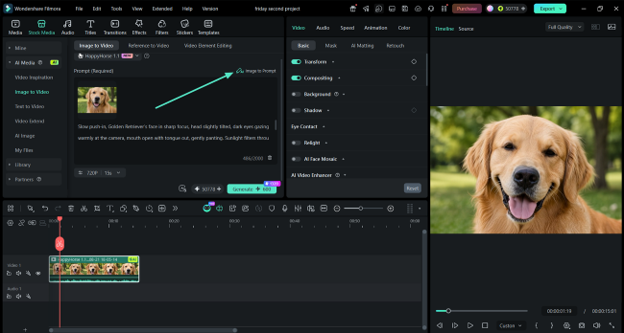
- Image to Prompt: Upload a reference image to describe its objects, colors, and style. Edit and reuse that description to keep generated clips sharing one look.
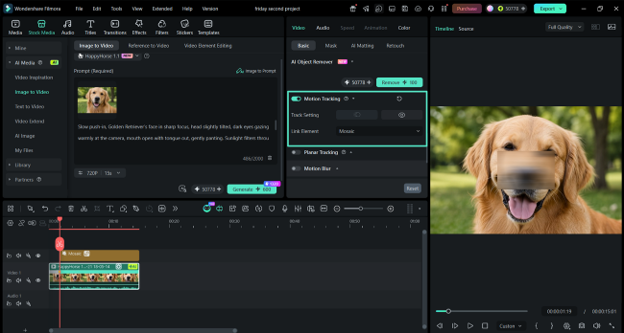
- Motion Tracking: Add captions, price tags, or logos onto subjects within generated clips. The attached graphic follows subject movement instead of remaining fixed on screen.
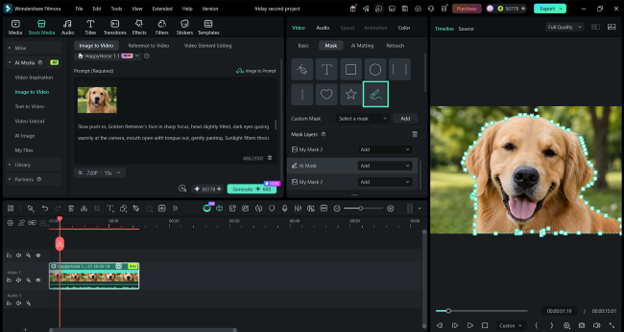
- AI Smart Masking: Isolate frame areas for grades, blurs, or effects without changing backgrounds. Use it when generated clips work well except for one problem region.
These tools do not generate content themselves, which makes their purpose quite different. They provide editing control that determines whether generated footage survives the final cut successfully.
Conclusion
To conclude, high-quality source images and clear motion prompts produce more convincing clips. Short generations also help prevent visual errors before the final illusion starts breaking. Treat each image-to-video AI generation as a draft worth refining several times. If you want an easier creation workflow, we recommend using Filmora for editing.
Frequently Asked Questions
- How does an AI image-to-video converter add movement to a flat photograph?
AI creates new frames by predicting how the photographed scene could move next. It recovers nothing beyond the photograph, so all generated movement is newly invented.
- Which photographs work best for photo-to-video AI generation?
Sharp photographs with clear subjects and simple backgrounds give AI better references. Crowds, small faces, and readable text are harder and tend to distort first.
- What is the maximum length of a clip generated from one image?
You select the video duration before generation, based on the model being used. Wondershare lists no universal limit, so check available durations for each selected model.
- Is an AI video generator from image files different from text to video?
Yes, image generation begins with a fixed first frame and expands from there. Text generation creates the entire scene, giving less control over the subject’s appearance.
- Can generated clips be used in commercial or client work?
Check current usage terms before you animate static photo content for commercial projects. Filmora support categorizes AI-generated images and videos for personal use, requiring terms confirmation.