Sticky videos, or any other elements of your website, for that matter, can be visually very appealing and enhance the impression you make on a visitor. They can just scroll around exploring your content that way, and the video always stays with them. Not only that, but things like sticky menus can make using and browsing your website so much easier, especially if you have pages with a lot of content on them.
You may be thinking that this sounds just a little bit complicated at first, but you actually don’t need any coding knowledge to be able to do this. All you need is a plugin called WP Sticky, and you will be able to create sticky videos, sticky headers, sticky menus, and so much more in a flash. Here’s how.
Getting started with WP Sticky
Obviously, the first thing you need to do is to install and activate your WP Sticky plugin. Once that’s done, go to “Settings,” then click on “Add New Sticky Element,” and the magic will begin.
Here, you will have the option to give the new sticky element some kind of a name, which can be pretty useful if you’re planning to make multiple sticky elements on the same site/page (there is no limit to the number of sticky elements you can create, and you can enable or disable them as you see fit). This feature helps you keep track of things in a fairly uncomplicated way.
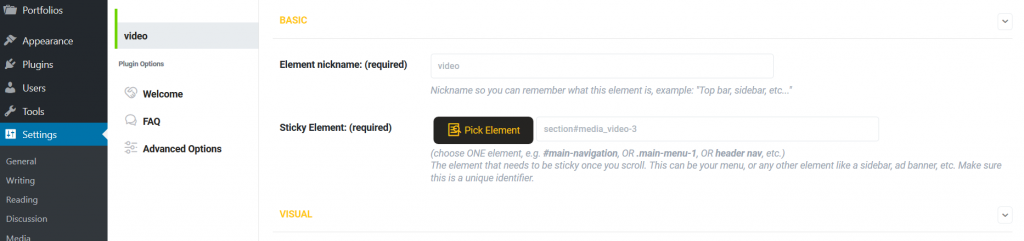
Below the nickname box, you will see a black button that says “Pick an element,” and this is the heart and soul of this plugin. Clicking it will take you to your website, where you can choose which element you want to make sticky by hovering your mouse. As you hover with your cursor above each element, it will become highlighted and if that’s what you want to make sticky, just click on it. Then click on “Save Changes,” and that’s pretty much it. Simple, right?
It should be said that this plugin works with absolutely every theme even with a WordPress theme for portfolios and is even compatible with other plugins and page builders. Because of that, it’s recommended you familiarize yourself well with the features of the theme you will be using.
How to make a sticky video
Now, you will notice that with this plugin, you only get to choose the element you’re making sticky. You can’t actually edit your website in any other way. So if you want to make a sticky video, that video will have to be there from the start.
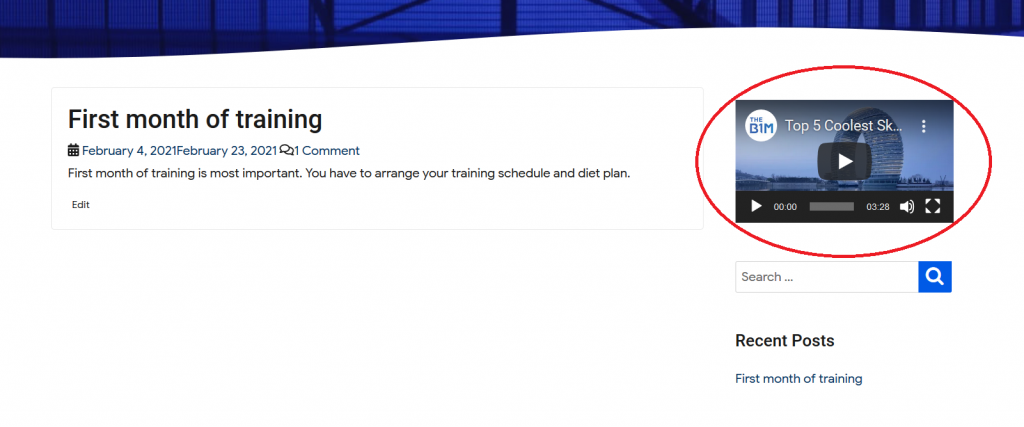
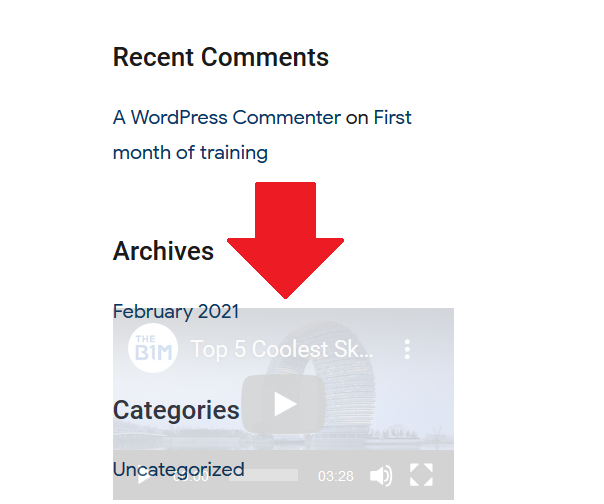
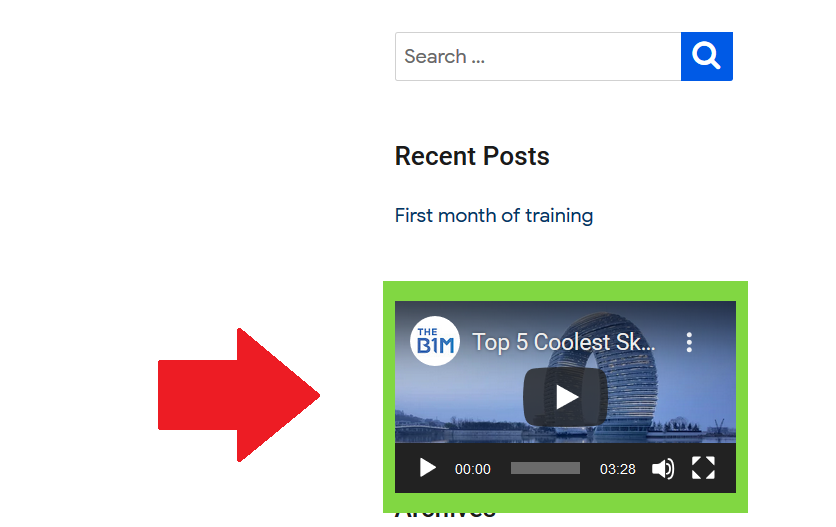
Also, you may want to choose a theme that allows you to customize sidebars and headers, not just footers, so that you can embed a video there, too. This is done through the widgets menu, and this is where you can put in your video.
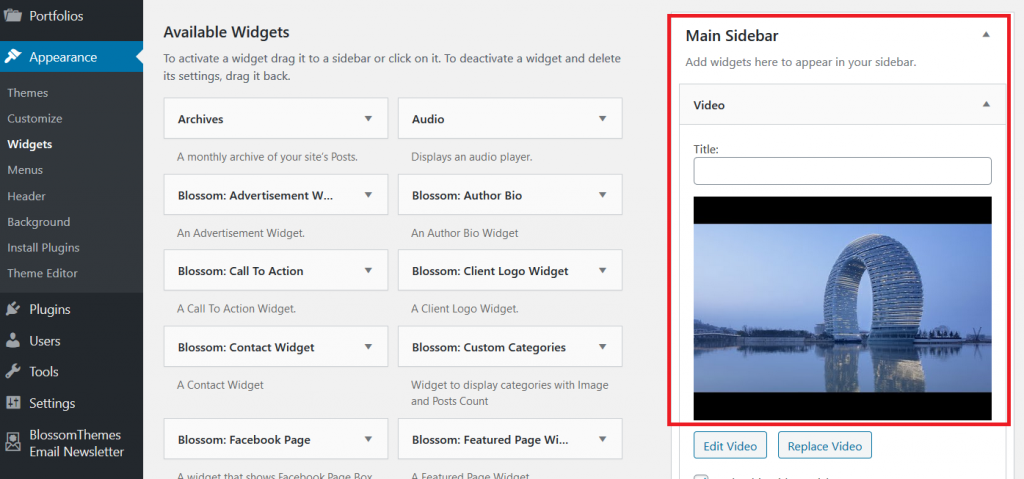
Once you do that, you will see that the video is in the place you want it to be, and then you can proceed with the plugin. So, as we said in the previous section of this article, select a name and go to the “Pick element” button. Then, find the video or any other element on your website you want to make sticky.
Just make sure that the selected element is written correctly in the field next to the Pick Element button. Check its class name or its ID if it’s not sticking how you want it to.
Now that you’re done with that, you can play around a bit with all the options you have with this product (more on that in just a minute). Don’t forget to click “Save Changes” in the upper right corner once you’ve adjusted everything to your liking. Next to that is a button that allows you to preview all the changes you’re making so that you can make corrections if there is any need for that.
But whichever element you decide to focus on, this plugin will allow you to make it sticky because, as shown, all it takes is a few clicks of your mouse. So, once you have the video up, just find it through WP Sticky, and you’ll have yourself a sticky video in no time.
In less than a minute, you can have what you’ve been looking for. For many, though, this is the point when the real fun begins because now you get to do a bit of customizing.
Customization options
Yes, WP Sticky also offers plenty of options. And you can make the element that sticks fit seamlessly into the whole website and wow your visitors even more. For example, you can add a couple of nice effects to that element.
For instance, it can fade in or slide down as the user scrolls. Or you can decide that the element only has to be sticky if the screen is of the right size to accommodate it. In other words, you can choose on which devices the “stickiness” will show.
Additionally, you can choose whether you want the element to stick to the top or the bottom of the page as the user scrolls, which can be quite useful for creating sticky menus because the user won’t have to scroll all the way back if they want to navigate away from that page.
You have ways to tweak this a bit as you can choose the number of pixels the space between the edge of the page and the element will have. So, if you don’t like the way everything looks by default, you can move things a bit to help them fit perfectly. You can even make the element stick to the bottom constantly once the user goes through a certain portion of the page (you decide how much), which is another nice choice to have.
Another exciting option is the scroll range. You may not want your sticky element to stay with the user the whole time. This can be managed by the scroll range slider, which defines the percentages after which an element becomes sticky and then reverts back to its original status.
So, for example, you can set the whole thing to become sticky after your visitor goes through 20% of the page, and when they go through more than 50%, the element will “go back” in a manner of speaking. This is quite worthy of considering if you don’t want that element to become annoying and have an adverse effect on the overall experience.
It is also possible to affect the way the sticky element looks on screen. You can choose how transparent or how opaque you want it to be through the use of a simple slider, and if you want it to stand out more, you can also change its background color. This can be very useful if you want to keep the sticky element highlighted somehow or help it blend in more naturally whenever a user scrolls.
And should some page elements overlap and your sticky menu (for example) gets covered, you can easily resolve this through the use of the Z-index. Just input the value you think is right, and if you’re not sure, just crank it to 99999.
Advanced options
And these are only basic visual options. There’s a whole array of what is classified as advanced options, so you customize everything even further. And you don’t have to do anything differently because the advanced options are just further down the page a bit. So, you just choose the element like before and open the Advanced section below.
One of the options included here is that you can select the part of the page that will reset the sticky element back to its original position once the user reaches it. Again, this can be any element at all, and this is another way to easily determine how long a sticky menu or a sticky video stays with your visitors.
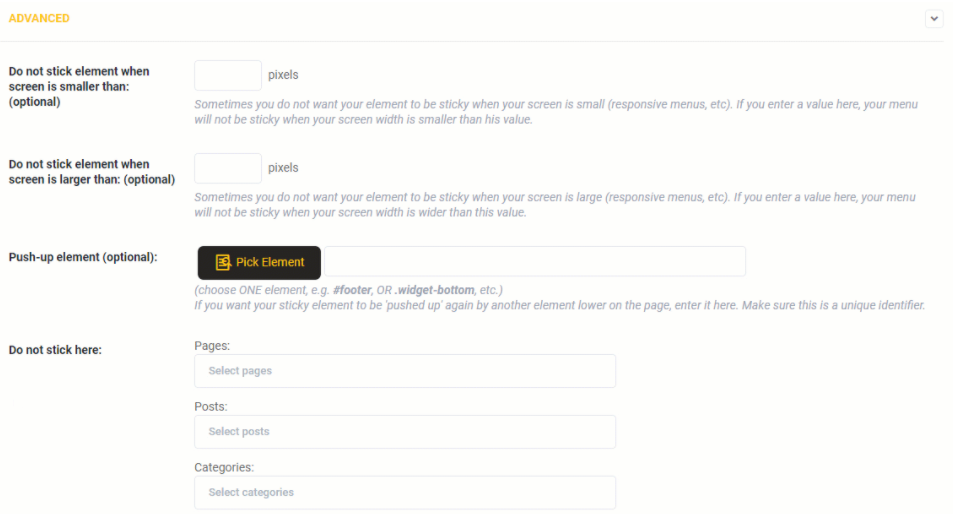
If you chose not to customize beyond the basic options, the choices you make there will apply to your whole website. So, if you create a sticky header, that header will be sticky on every page. However, it is possible to add exceptions to this rule if you so desire, and all you have to do is add the page you don’t want this to apply to the “Do not stick here” section.
Apart from pages, you can also add posts or categories here, which allows you to differentiate between different parts of your website clearly.
As you can see, this is more about fine-tuning your choices and making your website appear that much more serious. You probably didn’t even know you could do so much with sticky things on your website, but dedicating some time to it can certainly help you improve your users’ experience by quite a lot.
Prices
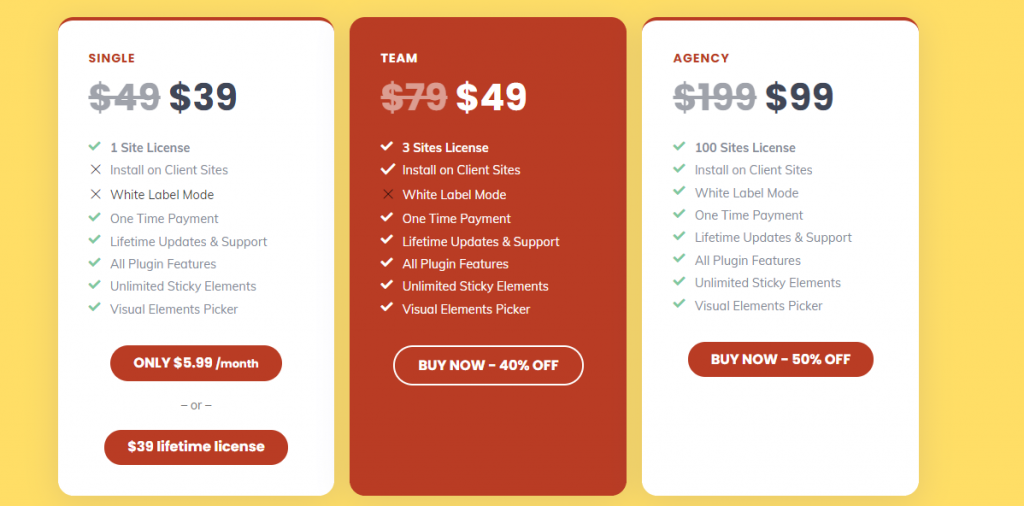
After all this, you must be wondering how much could something like this cost. Well, WP Sticky comes with a very fair price tag of 5.99$ per month for a single package.
However, if you know you’re going to be using it for a long while, you can opt for that same package’s lifetime license, and this one costs 39$. It includes excellent support, updates, and all the features without any limitations. Therefore, buying a lifetime license can be a great deal.
The other two packages are Team and Agency, which allow you to install this plugin on three and one hundred websites, respectively. Apart from that, the only other differences are the fact that you can install the plugin on clients’ sites and, of course, the price. At the moment, Team will set bac 49$, whereas Agency costs 99$.
Conclusion
WP Sticky is a great and useful plugin that is exceptionally easy to use. If you want to include a sticky element on your website, you can do so in literally less than a minute, and you can add a whole lot of visual features to it just to spice things up and create a more pleasant experience for any visitor.
Absolutely no coding knowledge is needed to make the most of this product, and when you consider the price models and what you get with each package, you can be nothing but delighted with the opportunity that is in front of you.
Therefore, if you want to come up with a sticky menu that helps your users move around the site more quickly, a sticky video, or a sticky header with a similar purpose in mind, WP Sticky is undoubtedly the perfect solution. Don’t hesitate and get it now!